
If you don’t have the time to read the AWS Well-Architected and the Security Pillar section, don’t worry, I’ve distilled them down to actionable steps you can implement today to help assess your current security posture.
What follows is a checklist to make sure you’re operating your AWS accounts according to these best practices, and a few additional ones that I feel are good security hygiene, in order of increasing importance. Note that while these recommendations are several steps above the absolute bare minimums, they aren’t exhaustive, and you should use them as a starting point for further hardening of your environment. Each section deserves its own comprehensive guide.
I’ve added checkboxes in the tasks lists for each section you can use to mark things as done, but you still need to do the work 😏. There are also expandable sections of useful AWS CLI commands, but they are mere suggestions and starting points.
Now, let’s start with the obvious and easy stuff.
AWS Security Check List
1. Secure the Root User Account
This is table stakes, but I’ve seen misconfigurations even here.
You should never login to the root user account, except for the first time, when you’re delegating Admin and Billing permissions to IAM users for regular use, and a handful of tasks that explicitly require it.
It’s a good idea to use a group email address for the root user account, to ensure emails from AWS are received in a timely manner, in case people are on vacation or have left the company.
Expand useful AWS CLI commands
Password policy
if aws iam get-account-password-policy --output text &>/dev/null; then echo "✅ Password policy set"; else echo "❌ No password policy found"; fi
Root user Multi-Factor Authentication (MFA)
if [[ -z $(aws iam list-mfa-devices --user-name root --output text) ]]; then echo "❌ No root MFA"; else echo "✅ MFA enabled for root"; fi
Root user access keys
if [[ -z $(aws iam list-access-keys --user-name root --query 'AccessKeyMetadata[?Status==`Active`].AccessKeyId' --output text) ]]; then echo "✅ No active root access keys"; else echo "❌ Active root access keys found"; fi
Confirmed account email address
EMAIL=$(aws organizations describe-account --account-id $(aws sts get-caller-identity --query Account --output text) --query 'Account.Email' --output text)
if [[ -z "$EMAIL" ]]; then echo "❌ Could not retrieve account email"; else echo "✅ Account email: $EMAIL"; fi
| Task | Notes |
|---|---|
| Set a strong password | Don’t store it in an AWS-dependent service |
| Enable MFA | |
| Deactivate or delete access keys | These should never be used |
| Verify the account email address | Ensure it’s also protected by MFA |
| Enable a backup MFA device | Store it separately from the main MFA |
2. Enable AWS Organizations
AWS Organizations lets you centrally manage multiple AWS accounts, including centralized billing, and access control, while maintaining isolation of accounts. Even if you’re a small organization, using AWS Organizations is recommended for account segregation, and to enable advanced security features like SCPs.
Create (or invite existing) accounts and group them into Organizational Units (OUs) based on department, environment, or other distinction. For example, separate accounts for staging and production.
Service control policies (SCPs) are policies set at the organization level that restrict permissions granted to users and roles, to define a stricter security boundary around any existing policies. For example, you can define an SCP that restricts deployment of EC2 instances that don’t have IMDSv2 enabled, even if an IAM user has the AdministratorAccess managed policy attached. Organizational-level controls like these would be difficult to implement at the IAM policy level.
You may be familiar with IAM permission boundaries, which limit the escalation of permissions at the identity level. SCPs are similar in that they “sandbox” and limit the maximum possible permissions, but at the account or OU level.
In every Organization, there is one account designated as the management account.
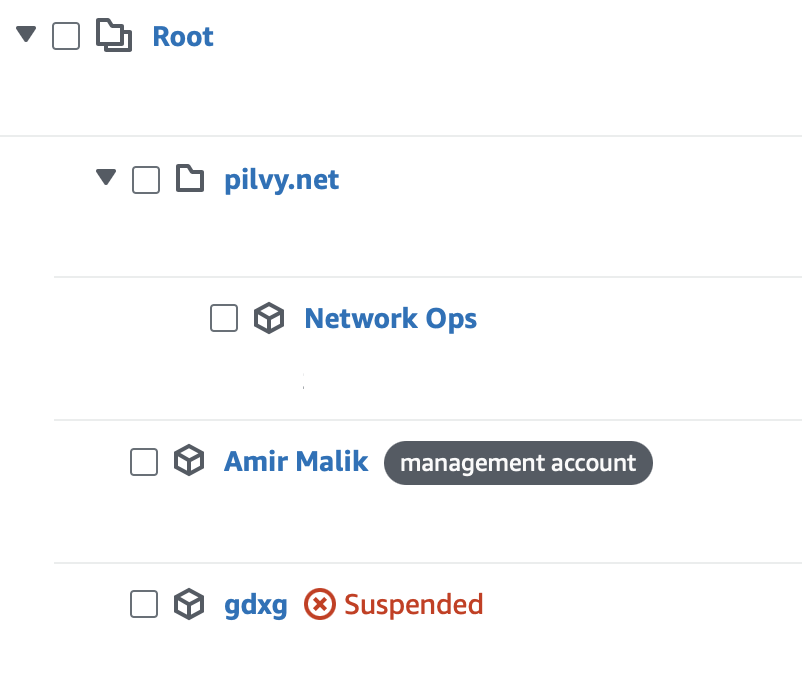
It’s the AWS account that was used to create the Organization. It’s also the account responsible for paying AWS bills. You should keep it as secure as the root account, because SCPs don’t work in it, meaning you can’t restrict users or roles.
If you’ve deployed anything in it, it’s time to migrate those workloads to a new account. I’m not aware of a way to designate another account as a management account at this time, so you might have a hard time with this task, but being able to use SCPs is worth the one-time hassle.
Note that defining appropriate SCPs is a complex process that depends on your workload and account segregation strategy, but I’ll cover some examples in a later section.
Expand useful AWS CLI commands
AWS Organizations enabled
if aws organizations describe-organization --output text &>/dev/null; then echo "✅ AWS Organizations enabled"; else echo "❌ AWS Organizations not enabled"; fi
SCPs enabled
if aws organizations describe-organization --query 'Organization.AvailablePolicyTypes[?Type==`SERVICE_CONTROL_POLICY`].Status' --output text | grep -q 'ENABLED'; then echo "✅ SCPs enabled"; else echo "❌ SCPs not enabled"; fi
Non-default SCPs defined
SCP_COUNT=$(aws organizations list-policies --filter SERVICE_CONTROL_POLICY --query 'length(Policies[?Name!=`FullAWSAccess`])' --output text)

if [[ "$SCP_COUNT" -gt 0 ]]; then
  echo "✅ $SCP_COUNT SCP(s) found (excluding FullAWSAccess):"
  aws organizations list-policies --filter SERVICE_CONTROL_POLICY --query 'Policies[?Name!=`FullAWSAccess`]' --output table
else
  echo "❌ No SCPs found (excluding FullAWSAccess)"
fi
| Task | Notes |
|---|---|
| Enable AWS Organizations | Use the root user account |
| Create AWS accounts | Create or invite existing AWS accounts |
| Group into OUs | Apply different policies based on purpose |
| Enable SCPs | Effective for non-management accounts only |
| Define SCPs | Limit the permissions of accounts or OUs |
| Enable consolidated billing | Centralize billing across all accounts |
3. Evaluate AWS Control Tower
If you already have a large AWS usage footprint, you’re likely using AWS Control Tower to make sure AWS accounts across your organization are in compliance, enable common services and policies, and to prevent configuration drift across accounts. Automatically enabling AWS Config, CloudTrail, Security Hub, GuardDuty, as well as service-specific policies can be set and enforced using Control Tower, making multi-account setups easier to manage.
If you only have a handful of accounts to manage, it may make sense to skip Control Tower altogether. Under the hood, Control Tower uses CloudFormation StackSets, so if you’re using that, you can deploy the same service configuration across accounts and regions, but it’s much easier using Control Tower.
As it’s too complicated to deal with here, refer to AWS’s prescriptive guidance for more background.
| Task | Notes |
|---|---|
| Evaluate AWS Control Tower | Recommended for multi-account setups |
4. Enable CloudTrail
CloudTrail is essential as it provides continuous logging and monitoring of all API calls made in AWS accounts by users and other AWS services. You can use it to track user activity and perform security audits. It’s the easiest thing you can do to enable high-visibility into your AWS environment.
While CloudTrail by itself records all activity, turning on CloudTrail Insights helps you identify unusual activity automatically. If you’re already ingesting CloudTrail events into another system, Insights may be of limited value.
In most cases, you’ll want to create an organization trail, so that activity in all accounts, including ones that are created in the future, is covered. If you setup Control Tower earlier, you’ll already have this set.
Expand useful AWS CLI commands
Multi-region CloudTrail
if [[ ! -z $(aws --region us-east-1 cloudtrail describe-trails --query 'trailList[?IsMultiRegionTrail==`true`].Name' --output text) ]]; then echo "✅ Multi-region CloudTrail enabled"; else echo "❌ No multi-region CloudTrail enabled"; fi
Organization trail
if [[ ! -z $(aws --region us-east-1 cloudtrail describe-trails --query 'trailList[?IsOrganizationTrail==`true`].Name' --output text) ]]; then echo "✅ Organization trail enabled"; else echo "❌ No Organization trail enabled"; fi
Log file validation
if [[ -z $(aws --region us-east-1 cloudtrail describe-trails --query 'trailList[?LogFileValidationEnabled==`false`].Name' --output text) ]]; then echo "✅ Log file validation enabled"; else echo "❌ Log file validation not enabled"; fi
CloudWatch Logs integration
if [[ $(aws --region us-east-1 cloudtrail describe-trails --query 'trailList[].CloudWatchLogsLogGroupArn' --output text) ]]; then echo "✅ CloudWatch Logs integration enabled"; else echo "❌ CloudWatch Logs integration not enabled"; fi
| Task | Notes |
|---|---|
| Enable CloudTrail | Use multi-region trail to capture everything |
| Log file validation | Prevents tampering |
| Organization trail | Covers all accounts in the organization |
| CloudWatch Logs integration | Enables real-time monitoring |
5. Enable AWS Config
AWS Config is an essential service that keeps track of resource configurations and their changes over time. It can be used to view historical configurations of resources, for instance, what ports were open in an EC2 security group at a specific time.
Config should be enabled in all regions, even ones you aren’t using. In addition, you should disable AWS regions not being used. Keep in mind regions introduced before March 20, 2019 are enabled by default.
Expand useful AWS CLI commands
Per-region status
regions=$(aws --region us-east-1 ec2 describe-regions --query "Regions[?OptInStatus=='opt-in-not-required' || OptInStatus=='opted-in'].RegionName" --output text)
echo "$regions" | tr '\t' '\n' | while read -r region; do
  echo -n "Region: $region - "
  config_recorders=$(aws configservice describe-configuration-recorders --region "$region" --query "ConfigurationRecorders[*]" --output text)
  if [ -n "$config_recorders" ]; then
    echo "✅ AWS Config enabled"
  else
    echo "❌ AWS Config not enabled"
  fi
done
| Task | Notes |
|---|---|
| Enable Config | For each region, choose 1-click setup |
6. Enable Security Hub
Security Hub is a one-stop view that aggregates findings from other security-related AWS services. It offers primitive support for triaging discovered issues, as well as integrations to ingest findings from third-party tools. AWS Config is a prerequisite in each region where you want to use Security Hub.
After enabling Security Hub, choose the security standards and apply per-service controls. While you can use Security Hub in a local configuration, it’s best to use central configuration, by delegating the administrator account, selecting a Home Region, and linking existing (and future) regions to it.
It may take up to a day for Security Hub to populate its findings and insights.
| Task | Notes |
|---|---|
| Enable Security Hub | Use central configuration |
| Apply standards | FSBP, NIST, PCI DSS, etc. |
| Apply controls | Per-service controls |
7. Enable GuardDuty
GuardDuty is a continuous threat detection service for finding compromised credentials, malware, cryptominers, and suspicious behavior at the OS level in EC2, ECS, EKS, and other workloads, in addition to leveraging VPC flow logs and DNS logs. Its findings flow into Security Hub.
GuardDuty also enables Route53 Resolver DNS query logs independently of whether you’ve enabled resolver query logging, and generates findings when suspicious hostnames are resolved. If you need full DNS resolver query logs, you’ll need to enable query logging separately.
In a multi-account organization, it’s best to delegate GuardDuty administration to a single account, to allow central management. Again, Control Tower makes this easier, if you’re using it.
| Task | Notes |
|---|---|
| Enable GuardDuty | Use central configuration |
| Delegate administration | Use a single account |
8. Migrate IAM Users to IAM Identity Center
Avoid IAM users for any human users that need AWS console or CLI access, since it’s yet another password and set of access keys that need their lifecycle managed (e.g., access key rotation, employees leaving, etc.).
IAM Identity Center (formerly known as SSO) is like IAM, but supports federated identities from external identity providers (IdP) like Google, Microsoft Active Directory, Okta, etc. In simple terms, it lets users authenticate with your existing SSO to authenticate with AWS for console, CLI, or API access. If you don’t have an SSO provider, then you can use the built-in directory; it’s similar to IAM users but more powerful.
Once setup, users can use the aws configure sso command to authenticate with IAM Identity Center without having to store long-term access keys.
| Task | Notes |
|---|---|
| Enable IAM Identity Center | |
| Connect an identity source | Built-in user directory or external IdP |
| Create or import users | Add users manually or import from your IdP |
| Assign AWS accounts | Grant users or groups access to specific accounts |
| Set up permission sets | e.g., AdministratorAccess |
| Enable MFA | Enforce MFA for all users |
| Set up CLI access for users | Use the aws configure sso command |
| Distribute portal URL | Old login link will no longer work |
9. Setup Security Alerts
Once critical security services have been enabled, you need a way to be notified when there are new findings. Fortunately, you can do this without relying on third-party tools. You could setup multi-channel notifications like sending all alerts to email, and send high-severity findings to a Slack channel.
Security Hub can be configured to send alerts to EventBridge, from where you can route specific events to relevant channels. Email and SMS can be configured through EventBridge, and you can use AWS Chatbot to integrate directly with Slack, where your security team can interact with an AWS-managed bot interface scoped to an AWS account role.
| Task | Notes |
|---|---|
| Security Hub findings | |
| GuardDuty findings | |
| CloudTrail Insights | |
| Config compliance | |
| IAM-related events | Console login, API calls, etc. |
10. Disable Unused AWS Regions
It’s a good idea to disable regions that aren’t being used. Investigate regions that are enabled:
regions=$(aws --region us-east-1 ec2 describe-regions --query "Regions[?OptInStatus=='opt-in-not-required' || OptInStatus=='opted-in'].RegionName" --output text)
echo "$regions" | tr '\t' '\n' | while read -r region; do
  echo "$region"
done
You can use the following AWS CLI command to disable a region, but you’ll need to do it for every single account in the organization:
aws account disable-region --account-id 123456789012 --region-name REGION
There’s a limit on how many pending region enable/disable requests can be in progress at the same time, so you may need to wait depending how many accounts/regions you’re disabling.
A more scalable approach is to define an SCP to restrict all operations in all regions except ones you allow:
{
  "Version": "2012-10-17",
  "Statement": [
    {
      "Sid": "DenyAllExceptSpecifiedRegions",
      "Effect": "Deny",
      "NotAction": ["iam:*"],
      "Resource": "*",
      "Condition": {
        "StringNotEquals": {
          "aws:RequestedRegion": [
            "us-east-1",
            "us-west-1",
            "us-west-2",
            "ap-northeast-1"
          ]
        }
      }
    }
  ]
}
We allow an exception for IAM, which is a global region, to allow for IAM users to still login to those regions, but you may omit that and change NotAction to have a single *:* entry. Note that this won’t remove the regions from the AWS console list nor update the region-opt status in the API.
| Task | Notes |
|---|---|
| Disable regions or attach SCP |
11. Prevent Usage of Default VPC
In most setups, using the default VPC isn’t recommended. It isn’t inherently bad, but it shows that you haven’t thought about network isolation enough, and can be a bad foot gun. You can either delete it by writing a script, but every time a new account is created, you’ll have to repeat the process. Another approach is to block deployments into it using this SCP:
{
  "Version": "2012-10-17",
  "Statement": [
    {
      "Sid": "PreventDefaultVPCUsage",
      "Effect": "Deny",
      "Action": [
        "ec2:RunInstances",
        "rds:CreateDBInstance",
        "rds:CreateDBCluster",
        "elasticloadbalancing:CreateLoadBalancer",
        "ecs:CreateService",
        "lambda:CreateFunction",
        "eks:CreateCluster",
        "eks:CreateNodegroup",
        "elasticache:CreateCacheCluster",
        "elasticache:CreateReplicationGroup",
        "redshift:CreateCluster",
        "dms:CreateReplicationInstance",
        "sagemaker:CreateNotebookInstance",
        "mq:CreateBroker",
        "kafka:CreateCluster",
        "memorydb:CreateCluster",
        "directconnect:CreatePrivateVirtualInterface",
        "ec2:CreateNatGateway",
        "ec2:CreateVpcEndpoint",
        "appmesh:CreateVirtualNode",
        "qldb:CreateLedger"
      ],
      "Resource": "*",
      "Condition": {
        "StringLike": {
          "ec2:Vpc": "arn:aws:ec2:*:*:vpc/vpc-*"
        },
        "Null": {
          "ec2:VpcID": "false"
        }
      }
    }
  ]
}
This isn’t an exhaustive list of actions, so adjust as you see fit. It would permit existing resources running in the default VPC to function, but prevent creating any new ones.
| Task | Notes |
|---|---|
| Attach SCP |
12. Use IAM Access Analyzer to Generate Policies
If you’re using overly permissive IAM policies with lots of wildcards, create an IAM Access Analyzer with external access analysis for the current organization.
Minimize the use of wildcard policies as much as possible. Remember that a wildcard can be supplied in the region field, thus making you vulnerable to cross-regional lateral movement, say, from your test environment to production. This means modifying wildcard policy entries to be more specific. In addition to no wildcards, you’ll want to separate policies intended for production, staging, and development workloads. IAM policies generated by Access Analyzer should still be reviewed for correctness.
| Task | Notes |
|---|---|
| Enable IAM Access Analyzer | |
| Review findings |
13. Use OIDC Instead of Access Keys for 3rd Parties
If you need to provide a third-party service, like a managed CI/CD system, access to an AWS account, check if that provider supports OpenID Connect. For example, if you need to authenticate against AWS from a GitHub Action, there’s no need to store AWS_ACCESS_KEY_ID and AWS_SECRET_ACCESS_KEY environment variables as secrets because GitHub supports an OpenID Connect integration in AWS by using GitHub as a trusted federated identity.
If you absolutely need to provide credentials to an external third-party that doesn’t support OIDC or direct IAM role assumption, consider using Security Token Service (STS) to generate temporary, time-restricted credentials for a role with restricted permissions.
| Task | Notes |
|---|---|
| Audit CI/CD secrets | |
| Audit CI/CD environment variables | |
| Migrate to OIDC | Revoke associated access keys |
More Services to Explore
Take a look at the following AWS services for more in-depth protection:
Macie
Use Macie to scan your S3 buckets for sensitive data, such as PII in uploaded documents, or generated reports.
Inspector
Inspector continuously scans EC2 instances, containers, Lambda functions for vulnerabilities. Its findings flow into Security Hub.
Network Firewall
Filter inbound and outbound network traffic across your VPCs or the Internet, including TLS inspection of encrypted traffic, using Network Firewall.
Shield
Use Shield, a managed DDoS protection service, for protecting your public endpoints from packet floods and other distributed attacks.
Security Lake
Security Hub and GuardDuty are great by themselves, but for more powerful SQL-like querying capabilities, enable Security Lake.
Summary
We’ve covered a lot of ground. Even if you didn’t follow all of the recommendations, you should at least be more aware of your organization’s security posture when it comes to AWS, and identify weak spots. I suggest taking a look at Security Hub findings once they’re ready, and then begin fine-tuning your policies to implement least-privilege access.
Unless you have a large security team or existing security tooling vendors, you can make a lot of progress using in-house AWS services without involving third-party products. And by the time you identify the need for an outside vendor, AWS might have a service that does it for you!